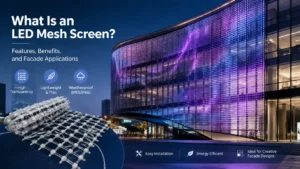
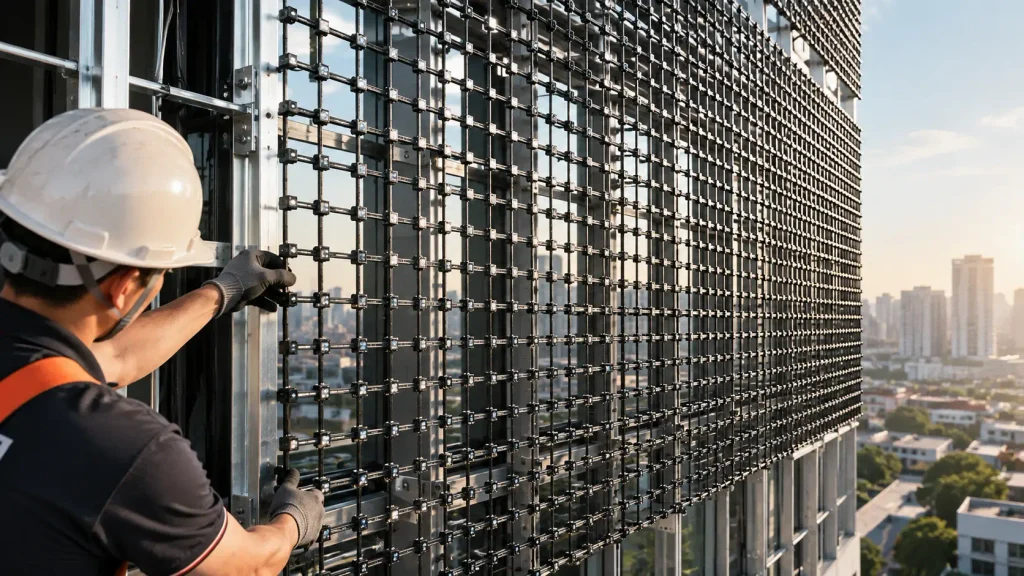
This guide explains the main steps involved in installing an LED mesh screen for building facades, outdoor advertising, commercial buildings, media facades, stages, and temporary events.
Safety note: Structural calculations, electrical connections, grounding, lifting operations, and work at height should be completed by qualified professionals. Always follow the manufacturer’s installation manual and the building, electrical, fire, and occupational safety regulations applicable to the project location.
Watch the LED Mesh Screen Installation Video
Before starting the detailed installation process, watch the installation video to understand the complete workflow.
Suggested video title:
How to Install an LED Mesh Screen on a Building Facade
The video should demonstrate:
- Site inspection and mounting-point marking;
- Installation of the steel frame or support profiles;
- Mounting of LED bars, modules, or cabinets;
- Power and signal cable connections;
- Grounding and waterproofing;
- Control-system configuration;
- Screen testing and final inspection。
Explore MEKALEO LED Mesh Screens and discover detailed product specifications, technical parameters, pixel options, and real-world applications for outdoor media facade projects.
1. Review the Installation Drawings and Product Manual
Before installation begins, the project team should review the approved drawings and the LED mesh screen manufacturer’s technical documentation.
Confirm the following information:
- Overall screen width and height;
- Number of LED units;
- Installation direction;
- Unit numbering;
- Mounting-bracket positions;
- Support-frame dimensions;
- Power-input locations;
- Signal-input and output locations;
- Control-system layout;
- Required clearance behind the screen;
- Maintenance and replacement method。
Different LED mesh screens may use different mounting clips, connectors, brackets, power supplies, and waterproofing methods. The product manual should always take priority over general installation advice.
Do not drill, cut, weld, or modify the LED screen frame unless the manufacturer and project engineer have approved the change.
2. Conduct a Site Assessment
A detailed site assessment is essential for an outdoor LED mesh screen installation, especially when the screen will be mounted on a building facade.
Inspect the Mounting Surface
Check whether the installation surface is structurally suitable. It may be a:
- Concrete wall;
- Steel structure;
- Curtain wall support;
- Commercial building facade;
- Independent frame;
- Stage truss;
- Temporary exhibition structure。
Inspect the surface for:
- Cracks;
- Corrosion;
- Loose materials;
- Deformation;
- Existing fixing points;
- Water leakage;
- Uneven areas;
- Insufficient load-bearing capacity。
The mounting brackets should be connected to a verified structural element. Decorative cladding, insulation panels, or non-structural facade materials should not be treated as primary load-bearing components without engineering approval.
Measure the Installation Area
Record the actual dimensions of the installation area, including:
- Available width and height;
- Position of windows and doors;
- Structural columns and beams;
- Distance from the facade;
- Screen edge clearance;
- Cable-entry locations;
- Power supply distance;
- Control-room location;
- Access for lifts or maintenance platforms。
Accurate measurements help prevent screen alignment problems, cable shortages, and interference with existing building services.
Check Environmental Conditions
For outdoor projects, review:
- Wind exposure;
- Rain and snow conditions;
- Temperature range;
- Direct sunlight;
- Dust and pollution;
- Salt or coastal exposure;
- Nearby roads and traffic;
- Maintenance access during bad weather。
These conditions affect the choice of screen configuration, support structure, cable protection, control equipment, and maintenance plan.
3. Evaluate Wind Load and Structural Requirements
Wind load is one of the most important considerations when installing an LED mesh screen on a building facade.
The engineering assessment may include:
- Building height;
- Project location;
- Basic wind speed;
- Screen dimensions;
- Open-area ratio;
- Screen orientation;
- Mounting distance from the facade;
- Bracket spacing;
- Anchor type;
- Steel-frame strength;
- Connection strength。
The open structure of an LED mesh screen can allow air to pass through the display. However, the screen still creates loads on the brackets, support frame, anchors, and building structure. The actual wind force depends on the product design and project conditions.
For projects in the United States, ASCE/SEI 7 is commonly referenced for minimum design loads and associated criteria:
The applicable standard edition, wind parameters, and structural calculations should be confirmed by the project’s structural engineer.
4. Select the Appropriate Mounting Method
The correct installation method depends on the screen size, building structure, installation height, and whether the project is permanent or temporary.
Fixed Facade-Mounted Installation
This method is suitable for permanent installations on:
- Shopping malls;
- Office buildings;
- Stadiums;
- Commercial buildings;
- Building exteriors;
- Media facades。
The screen is attached to engineered brackets, aluminum profiles, or a steel support frame connected to the building structure.
Steel Frame-Supported Installation
A separate steel frame may be required when:
- The facade cannot directly support the screen;
- The screen area is large;
- The facade is uneven;
- The display must be installed away from the wall;
- A rear maintenance passage is required。
The support frame should be designed for the screen’s dead load, wind load, connection forces, and applicable maintenance loads.
Suspended Installation
Suspended LED mesh screens are often used for:
- Concerts;
- Stage productions;
- Trade shows;
- Exhibitions;
- Temporary brand events。
Before installation, confirm the load capacity of the truss, ceiling, lifting points, and suspension equipment. All rigging components should be appropriately rated and inspected.
Curved or Irregular-Surface Installation
For curved or irregular building surfaces, confirm:
- Minimum bending radius;
- Permitted bending direction;
- Maximum support-point spacing;
- Connector flexibility;
- Screen alignment;
- Access for future repairs。
A rigid screen unit should never be forced to follow a curve beyond the manufacturer’s specifications.
5. Prepare Tools, Materials, and Safety Equipment
Installation Materials
Typical materials include:
- Steel support frames;
- Aluminum profiles;
- Mounting brackets;
- Bolts, nuts, and washers;
- Approved anchors;
- LED screen units;
- Power cables;
- Data cables;
- Waterproof connectors;
- Distribution boxes;
- Cable trays or conduits;
- Grounding conductors;
- Protective covers and seals。
The final list should be prepared from the approved engineering drawings and product manual.
Installation Tools
Common tools include:
- Laser level;
- Spirit level;
- Measuring tape;
- Laser distance meter;
- Torque wrench;
- Electric drill;
- Socket tools;
- Multimeter;
- Insulation tester;
- Cable-labeling tools;
- Lifting equipment;
- Scaffolding or access platforms。
Safety Equipment
Depending on the project, workers may need:
- Safety helmets;
- Safety harnesses;
- Fall-arrest equipment;
- Protective gloves;
- Safety shoes;
- Insulated tools;
- Barricades;
- Warning signs;
- Certified lifting equipment。
For work at height in the United States, review the applicable OSHA fall-protection requirements:
https://www.osha.gov/fall-protection
6. Install the LED Mesh Screen Mounting Structure
The mounting structure determines the screen’s alignment, stability, and serviceability.
Mark the Mounting Points
Use the installation drawings to mark:
- Horizontal reference lines;
- Vertical reference lines;
- Bracket positions;
- Anchor locations;
- Screen starting point;
- Cable-entry points;
- Maintenance access areas。
The first reference line should be checked carefully. A small error at the starting point can cause visible misalignment across the entire display.
Install the Main Support Frame
Install the main structural components in the approved sequence:
- Vertical supports;
- Horizontal rails;
- Mounting brackets;
- Secondary support members;
- Connection plates;
- Screen fixing points。
The support frame must be securely connected to the approved structural elements of the building or independent frame.
Check Level, Plumb, and Spacing
Before mounting the LED units, inspect:
- Horizontal level;
- Vertical plumb;
- Support spacing;
- Frame flatness;
- Distance from the facade;
- Clearance around windows and equipment;
- Maintenance space behind the screen。
A laser level is particularly useful for large facade installations because small alignment errors become more noticeable as the screen size increases.
Tighten and Inspect the Connections
Check every connection for:
- Correct fastener type;
- Proper washer placement;
- Sufficient thread engagement;
- Tightened bolts;
- Complete welds;
- Corrosion protection;
- Structural movement;
- Loose or damaged components。
Use the torque requirements specified in the approved drawings or manufacturer’s instructions.
7. Mount the LED Mesh Screen Units
After the support structure has passed inspection, install the LED mesh units according to the layout drawings.
Follow the Unit Numbering
The LED bars, modules, or cabinets should be installed according to their assigned numbers. The numbering should correspond with:
- Installation drawings;
- Power-distribution drawings;
- Signal diagrams;
- Control-system configuration;
- Maintenance records。
Correct numbering makes future testing and troubleshooting more efficient.
Secure the Display Units
Depending on the product design, LED mesh screen units may be secured with:
- Mounting clips;
- Bolts;
- Quick-lock connectors;
- Hanging hooks;
- Aluminum profiles;
- Dedicated cabinet brackets。
All connections should be fully locked before moving to the next section.
Maintain Consistent Spacing
During installation, check that:
- All units are on the same plane;
- Gaps are consistent;
- Connectors are fully engaged;
- The screen is not twisted;
- Cables are not pinched;
- The display does not rub against the support frame;
- The units are not under excessive tension。
Inconsistent spacing can cause visible lines, irregular patterns, or uneven image quality after commissioning.
Reserve Maintenance Clearance
The installation must provide a practical way to access the screen in the future. Possible maintenance methods include:
- Front access;
- Rear access;
- Service walkways;
- Lifting platforms;
- Suspended platforms;
- Removable access sections。
Maintenance access should be planned before installation. A screen that cannot be safely accessed will be more difficult and expensive to repair.
8. Connect the Power Distribution System
All electrical work should follow the approved electrical drawings and local regulations.
Plan the Power Distribution
Confirm:
- Distribution-cabinet location;
- Number of power circuits;
- Circuit load;
- Cable size;
- Voltage requirements;
- Voltage drop;
- Overload protection;
- Leakage protection;
- Emergency shutoff;
- Cable length;
- Inspection access。
The total power load should be calculated from the actual screen configuration and operating conditions.
Connect the Power Cables
Connect the power cables according to the manufacturer’s wiring diagram.
During installation:
- Label every circuit;
- Keep cable routes organized;
- Protect cables from sharp edges;
- Avoid excessive bending;
- Prevent water from entering connectors;
- Secure cables against vibration;
- Keep distribution equipment accessible。
Complete Grounding and Electrical Protection
Depending on the design, grounding may be required for:
- LED screen frames;
- Steel support structures;
- Distribution cabinets;
- Metal cable trays;
- Control equipment;
- Other exposed conductive components。
For projects in the United States, the National Electrical Code, published as NFPA 70, is a key reference for electrical installation requirements:
https://www.nfpa.org/codes-and-standards/nfpa-70-standard-development/70
Projects in other countries should follow the applicable local electrical codes.
9. Connect the Signal and Control System
The control system may include:
- Media player;
- Video processor;
- Sending card;
- Receiving cards;
- Data cables;
- Network switches;
- Control software;
- Remote monitoring equipment。
Follow the Signal Diagram
Connect the system according to the approved signal topology. Confirm:
- Input and output direction;
- Receiving-card sequence;
- Cable type;
- Transmission distance;
- Screen mapping;
- Network configuration;
- Backup signal path。
An incorrectly connected data cable may cause part of the display to remain blank or show incorrect content.
Separate Power and Signal Cables
Power and signal cables should be routed in an organized manner and separated where required by the project design.
All cables should be:
- Clearly labeled;
- Mechanically supported;
- Protected from water;
- Protected from abrasion;
- Kept away from moving parts;
- Accessible for future maintenance。
Good cable management makes the system easier to inspect, repair, and expand.
10. Complete Waterproofing and Outdoor Protection
Outdoor installation requires more than using outdoor-rated screen components. Cable connections, control equipment, and structural interfaces also need appropriate protection.
Protect Cable Connections
Pay particular attention to:
- Power connectors;
- Data connectors;
- Cable-entry points;
- Junction boxes;
- Distribution cabinets;
- Top and bottom screen edges;
- Exposed connection areas。
Waterproofing methods should follow the manufacturer’s instructions. Do not block drainage or ventilation openings with sealant.
Check the IP Rating
The IP rating describes the protection provided by an enclosure against solid objects and water under defined test conditions.
IEC 60529 is the international standard associated with IP protection ratings:
https://webstore.iec.ch/en/publication/2452
For an outdoor LED mesh screen, confirm the relevant protection rating for:
- Front of the screen;
- Rear of the screen;
- Power supplies;
- Control boxes;
- Connectors;
- Junction boxes。
An IP rating should not be treated as a guarantee that the system will withstand every weather condition, improper installation, or long-term water accumulation.
Maintain Drainage and Ventilation
Before commissioning, verify that:
- Water cannot accumulate behind the screen;
- Drainage paths are open;
- Cable loops do not guide water into connectors;
- Control boxes are properly protected;
- Ventilation paths are not blocked;
- Power supplies have sufficient heat-dissipation space。
Although the open structure of an LED mesh screen can improve airflow, power supplies and control equipment still require appropriate ventilation.
11. Power On and Commission the LED Mesh Screen
Do not power on the system until the mechanical, electrical, and waterproofing inspections are complete.
Perform Pre-Power Checks
Before energizing the display, check:
- Input voltage;
- Cable polarity;
- Grounding;
- Insulation;
- Circuit connections;
- Connector locking;
- Waterproofing;
- Distribution protection;
- Emergency shutoff。
Test Each Screen Unit
Inspect the screen for:
- Blank areas;
- Flickering;
- Dead pixels;
- Incorrect colors;
- Uneven brightness;
- Signal loss;
- Abnormal noise;
- Overheating;
- Loose connections。
Testing should begin section by section before the entire display is operated as one system.
Configure Display Parameters
The control system may require configuration of:
- Screen resolution;
- Module or cabinet layout;
- Brightness;
- Refresh rate;
- Grayscale;
- Color temperature;
- Display orientation;
- Input source;
- Content aspect ratio。
Brightness should be adjusted according to ambient light and project requirements. Excessive brightness can increase energy consumption and create glare in nearby areas.
Run a Full-System Test
Operate the complete system continuously for the test period specified by the project or manufacturer. Monitor:
- Screen temperature;
- Power stability;
- Signal transmission;
- Brightness uniformity;
- Color consistency;
- Controller performance;
- Unexpected shutdowns;
- Outdoor operating conditions。
Record any abnormal behavior and correct it before final handover.
12. Complete the Final Installation Inspection
A final inspection should include mechanical, electrical, display, and documentation checks.
Mechanical Inspection
Confirm that:
- The screen is securely fixed;
- The support structure is stable;
- Fasteners are tight;
- The screen surface is aligned;
- Unit spacing is consistent;
- No frame is deformed;
- Maintenance access is available。
Electrical Inspection
Confirm that:
- Power circuits are labeled;
- Grounding is complete;
- Protective devices operate correctly;
- Cables are secured;
- Connectors are protected;
- Distribution cabinets are accessible;
- Emergency shutoff is clearly identified。
Display Inspection
Check:
- Full-screen image;
- Brightness uniformity;
- Color consistency;
- Refresh performance;
- Signal stability;
- Content playback;
- Remote control;
- Monitoring alarms。
Prepare Handover Documents
The final project documents should include:
- As-built installation drawings;
- Power-distribution diagram;
- Signal-wiring diagram;
- Screen-unit numbering;
- Control-system configuration;
- Testing records;
- Warranty documents;
- Maintenance instructions;
- Replacement-parts information。
13. LED Mesh Screen Maintenance After Installation
Regular maintenance helps identify structural, electrical, and display problems before they cause system downtime.
Inspect the Mounting Structure
At scheduled intervals, check:
- Brackets;
- Bolts;
- Welded joints;
- Anchor points;
- Corrosion;
- Frame deformation;
- Screen movement;
- Signs of excessive vibration。
The inspection frequency should reflect the screen location, weather exposure, building height, and local requirements.
Check Cables and Waterproof Connections
Look for:
- Loose connectors;
- Cracked seals;
- Cable aging;
- Water ingress;
- Damaged insulation;
- Corrosion;
- Unsecured cable sections。
Clean the Screen Correctly
Use only the cleaning method recommended in the product manual. Excessive water pressure or unsuitable chemicals may damage LED components, coatings, connectors, and seals.
Replace Faulty Units
When replacing an LED unit, power supply, or receiving card:
- Switch off the relevant circuit;
- Confirm the unit number;
- Replace it with a compatible part;
- Check all connections;
- Test the repaired section;
- Recalibrate brightness or color if required;
- Record the maintenance work。
14. Common LED Mesh Screen Installation Mistakes
Installing on a Non-Structural Surface
Decorative cladding may not be designed to support an LED display or its mounting structure.
Ignoring Wind Load
A lightweight screen can still transfer significant forces to brackets, anchors, and the building structure.
Skipping Alignment Checks
An incorrectly aligned support frame can result in visible gaps and uneven screen lines.
Failing to Reserve Maintenance Access
Without suitable access, replacing a faulty unit may require expensive lifting equipment or partial disassembly.
Poor Cable Management
Unmarked, loose, or unprotected cables increase the risk of signal faults, water damage, and difficult troubleshooting.
Insufficient Waterproofing
Outdoor-rated components may still fail if connectors, cable entries, and control boxes are not properly protected.
Powering On Before Inspection
Premature energization can damage components and create unnecessary electrical risks.
Modifying the Screen Without Approval
Unauthorized drilling, cutting, or welding may affect structural integrity, product performance, and warranty coverage.
Skipping Full-System Testing
Testing only a few units is not sufficient for a large LED mesh display. The complete screen, control system, and power-distribution system should be tested together.
15. LED Mesh Screen Installation Checklist
Before Installation
- Installation drawings approved;
- Product manual reviewed;
- Site dimensions confirmed;
- Mounting surface inspected;
- Wind-load requirements evaluated;
- Fixing points verified;
- Power capacity confirmed;
- Cable routes planned;
- Maintenance access planned;
- Safety equipment prepared。
During Installation
- Reference lines marked;
- Support frame installed;
- Frame alignment checked;
- Fasteners tightened;
- LED units installed according to numbering;
- Unit spacing checked;
- Power cables connected;
- Signal cables connected;
- Cables labeled and secured;
- Grounding completed;
- Waterproofing completed;
- Drainage and ventilation checked。
After Installation
- Electrical safety inspection completed;
- Screen units tested;
- Control system configured;
- Full-system test completed;
- Brightness and color checked;
- Support structure inspected;
- Maintenance access confirmed;
- Handover documents prepared;
- Maintenance schedule established。
Conclusion
A successful LED mesh screen installation starts with proper planning, not with screen assembly. The project team should first confirm the facade condition, mounting points, wind-load requirements, screen layout, electrical capacity, cable routes, and maintenance access.
During construction, the support structure must be securely fixed and accurately aligned before the LED units are mounted. Power and signal cables should follow the approved drawings, while grounding, waterproofing, drainage, and ventilation require special attention in outdoor applications.
After installation, the entire system should be tested in stages. Mechanical stability, electrical safety, signal transmission, display performance, weather protection, and maintenance access should all be checked before handover.
The most important principle is to treat LED mesh screen installation as an engineering project rather than a simple assembly task. For large outdoor displays and building facade applications, structural design, electrical planning, professional lifting, work-at-height protection, and regular maintenance are all essential to long-term reliability.
Article References and Technical Sources
ASCE/SEI 7 — Minimum Design Loads and Associated Criteria
Used as a reference for wind-load and structural-load considerations.
https://www.asce.org/publications-and-news/civil-engineering-source/article/2022/06/01/asce-7-loads-standard/NFPA 70 — National Electrical Code
Used as a reference for electrical installation, grounding, distribution, and protection.
https://www.nfpa.org/codes-and-standards/nfpa-70-standard-development/70OSHA — Fall Protection
Used as a reference for work-at-height and fall-protection requirements.
https://www.osha.gov/fall-protectionIEC 60529 — Degrees of Protection Provided by Enclosures
Used as a reference for IP protection ratings against solid objects and water.
https://webstore.iec.ch/en/publication/2452LED Mesh Screen Manufacturer’s Installation Manual
Use the specific product manual to verify mounting dimensions, bracket spacing, cable connections, IP rating, power requirements, and maintenance procedures.
Standards and regulations may vary by country, state, city, and project type. The links above are technical references, not substitutes for project-specific engineering documents or local authority requirements.